
TL;DR
In small spaces like closets, the biggest improvements come from strategic placement and absorbing surfaces, not just foam or sealing gaps. Moving your rig away, treating reflective surfaces, and sealing gaps reduce noise and improve sound clarity more effectively than traditional soundproofing methods.
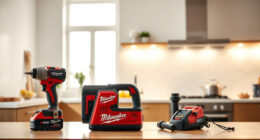
Ever wonder why your closet setup still sounds boomy or leaks noise? It’s not just about slapping foam panels everywhere. The real game-changer is where you put your gear and what’s around it. Moving your rig into a closet or another room can cut noise dramatically without any fancy treatment. This guide reveals how placement and simple dampening tricks can transform your tiny studio into a quiet, professional-sounding space.
If you’re tired of echo, boomy sound, or your voice leaking into the mic, you’ll see that a few strategic moves and affordable materials can make a huge difference. Whether you want a whisper-quiet workspace or clearer recordings, understanding these practical tips will help you get there fast.
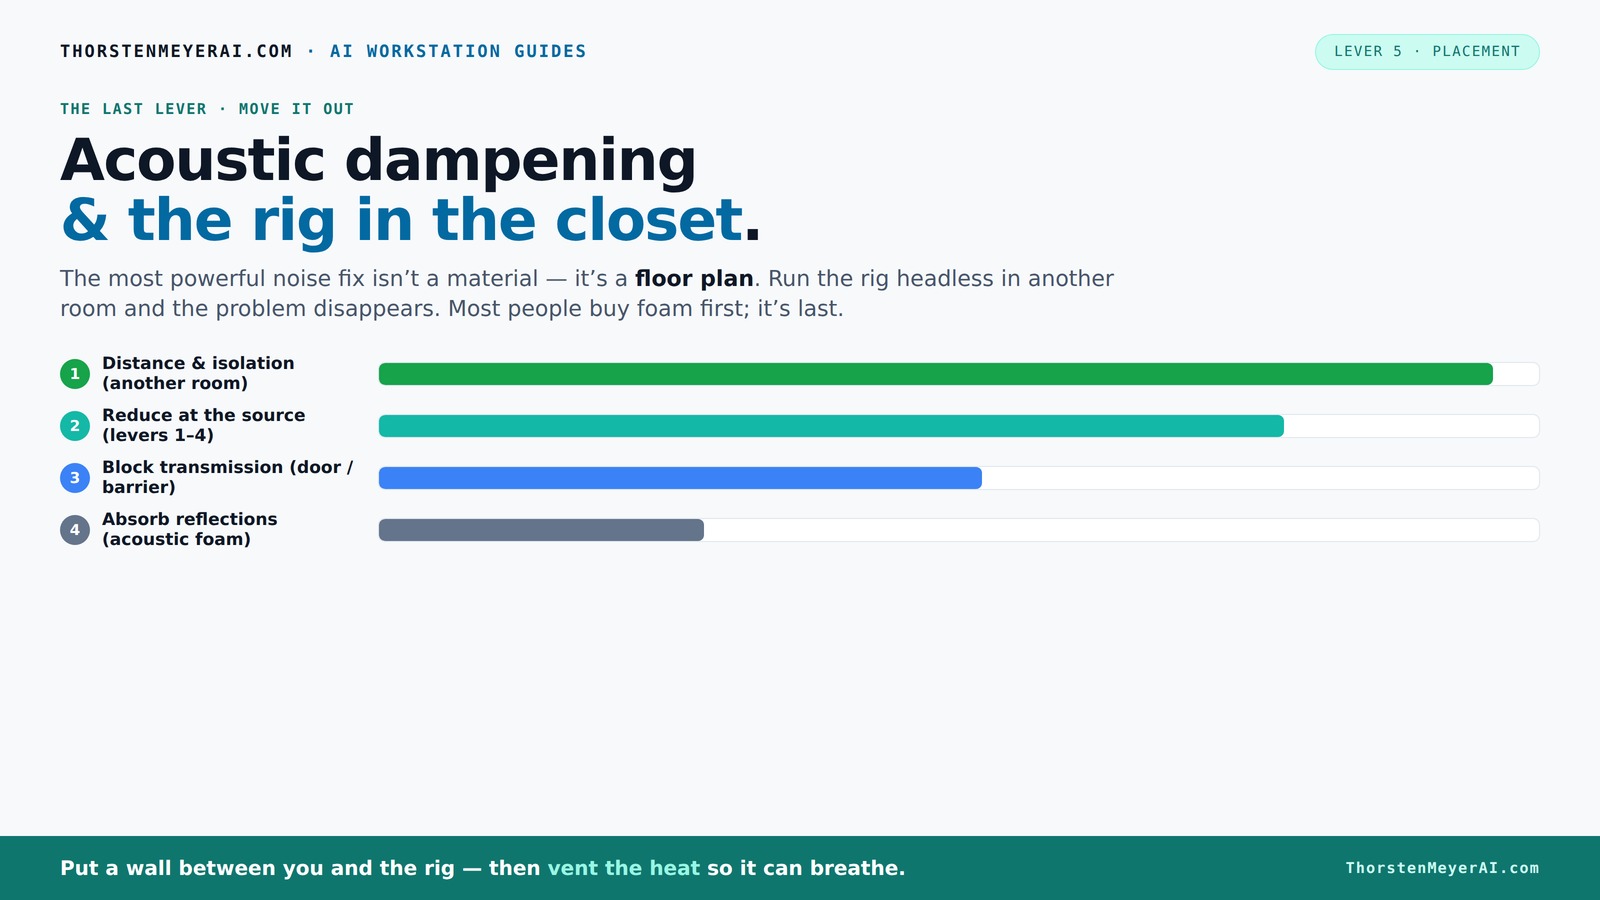
Acoustic dampening
& the rig in the closet.
The most powerful noise fix isn’t a material — it’s a floor plan. A rig you can’t hear because it’s in another room beats any amount of foam. Tap the approaches in Part 1 to see what actually works.
(another room)
(levers 1–4)
(door / barrier)
(acoustic foam)
Contain the noise, not the heat
Key Takeaways
- Moving your rig into a different room or closet dramatically reduces noise more than foam panels alone. Learn more about sound management techniques.
- Treat reflections with placement—aim your mic away from reflective surfaces and use soft materials around it.
- Sealing gaps around the door and using blankets or foam can cut sound leakage by over 70%.
- In tiny spaces, addressing bass buildup with corner treatments prevents hollow, boomy recordings.
- Affordable DIY materials like blankets, foam, and rugs can create a surprisingly effective closet studio.

Focusound 52 Pack Acoustic Foam Panels 1" x 12" x 12" Sound Proof Foam Panles Soundproofing Noise Cancelling Wedge Panels for Home Office Recoding Studio with 300PCS Double-Side Adhesive
Soundproofing - Acoustic foam panels triangular grooves structure for better noise absorption, helps to reduce and absorb unwanted...
As an affiliate, we earn on qualifying purchases.
As an affiliate, we earn on qualifying purchases.
Why Your Closet Is Better Than Those Fancy Panels
Putting your rig in a closet or another room is the simplest, most effective way to tame noise. Unlike foam panels, which only soften reflections inside a space, moving the machine away stops most noise before it reaches your ears. Think of it like turning down the volume by distance, rather than just muffling it.
Imagine your GPU rig humming loudly on your desk. When you move it to a closet or basement, the sound drops by over 80%, according to acoustic principles. You’re not just hiding the noise—you’re eliminating it at the source or blocking its path.
This method is especially perfect for remote AI workstations, where your machine doesn’t need to sit next to you. All you need is a solid network connection and some ventilation, and your workspace stays silent while your rig roars in another room.
Relocating your rig takes advantage of the fact that sound diminishes with distance. This tradeoff is often more practical and cost-effective than installing multiple layers of soundproof barriers. It also offers flexibility—you can move your setup as needed without permanently altering your environment.
60 Pack Acoustic Panel Polyurethane Foam Sound Proof Acoustic Treatment Room Kit for Absorbing Sound on Walls, 1" X 12" X 12" Sound-Proof Material for Home Studio Ceiling (60 Pack) (60PCS)
Quality Material - We choose to handcraft with fine fabrics of polyurethane foam to finish our acoustic panels...
As an affiliate, we earn on qualifying purchases.
As an affiliate, we earn on qualifying purchases.
Acoustic Dampening vs. Soundproofing: What’s the Real Deal?
Acoustic dampening is about softening echo and reducing reflections within a space. Soundproofing, on the other hand, tries to block sound from leaving or entering. In a closet setup, most of your gains come from dampening and placement, not full soundproof barriers.
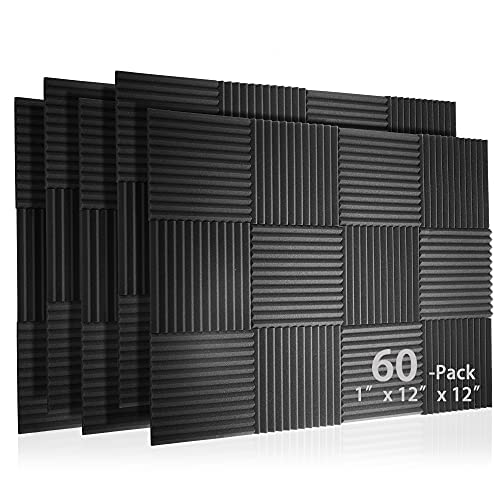
For example, adding blankets or foam inside the closet will cut down echo and reflections, making your voice clearer. You can also explore acoustic dampening tips for better results. But to stop noise from leaking out, you need a good door seal and barriers. Research shows that foam absorbs only about 20-30% of airborne noise [3].
Understanding this distinction is crucial because it influences your approach. Dampening improves the clarity and quality of your recordings by controlling internal reflections, which can cause echo and muddiness. For more insights, visit automotive tuning and DIY guides. Conversely, soundproofing focuses on preventing noise from escaping or entering, which is often more difficult and expensive. In a small closet, a combination of interior dampening and gap sealing offers a practical balance—improving sound quality without the need for full-fledged soundproofing.
Choosing to prioritize dampening and strategic placement means you’re addressing the most impactful issues for your specific environment, rather than investing in costly, complex barriers that may not be necessary.

Dmsky Microphone Isolation Shield with Pop Filter & Tripod Stand, Foldable Mic Shield with Triple Sound Insulation, High Density Mic Sound Shield for Recording Studio, Podcasts, Singing, Broadcasting
【Excellent noise reduction】Triple Sound Insulation,foldable Microphone Isolation with reflective layer+filter layer+absorbing layer.the high-density acoustic foam that eliminates audio...
As an affiliate, we earn on qualifying purchases.
As an affiliate, we earn on qualifying purchases.
Where to Place Your Mic and Absorptive Materials for Best Sound
Placement is king when it comes to quality sound in a closet. Your mic should aim toward the least reflective surface—ideally away from the door and reflective walls. Check out placement strategies for optimal results. Proper placement can significantly reduce unwanted reflections that cause echo and muddiness. Positioning your mic near soft materials like foam or blankets helps absorb bouncing sound waves, preventing them from reaching your microphone and degrading your recording quality.
For absorbing reflections, focus on these key spots:
- The wall directly behind the mic (to absorb rear reflections)
- The ceiling (especially in a small space, where sound bounces downward)
- The area directly in front of the mic (use a soft surface or a shield)
- The floor—adding a rug or blanket can significantly cut bass buildup
For example, a creator in a tiny closet used a foam panel behind the mic, a blanket on the door, and a rug on the floor. These strategic placements absorb reflections at critical points, resulting in a clearer, more focused sound. Proper placement reduces the need for expensive acoustic treatments and makes your setup more effective and adaptable.
Understanding the importance of positioning helps you target problem areas directly, maximizing your investment in simple materials and minimizing echo and unwanted noise.
Everlasting Comfort 2 Sided Door Draft Stopper for Bottom of Door - Keeps Cold Air in & Heat Out, 100% Sound Proofing Strip Gap Filler, Quick Install Noise Blocker Sweep for Home - Fits 30"- 36" W
QUICK AND EASY INSTALL: Ideal for doors 30" to 36" wide. Install in a few easy steps -...
As an affiliate, we earn on qualifying purchases.
As an affiliate, we earn on qualifying purchases.
How to Seal Gaps and Treat the Door for Less Leakage
Gaps around the door are the biggest leaks in a closet booth. Sealing them is cheap and effective, but it also influences the overall acoustic environment by preventing sound from escaping and reducing external noise intrusion. Learn more about sealing and treatment at soundproofing techniques. Use weatherstripping or acoustic sealant around the door frame to create a tight barrier that minimizes sound leakage. These materials fill in the gaps where sound waves could escape, ensuring your recordings are cleaner and your environment quieter.
For example, a YouTuber sealed their closet door with foam strips, reducing leakage by 70%. Covering the door with moving blankets also helps because it adds an additional layer of absorption, damping residual reflections and muffling sound escape. Remember, even tiny gaps can let a significant amount of sound pass through, so thorough sealing is essential for a controlled environment.
In addition, soft materials like a thick curtain or blanket over the door can absorb residual reflections, making your space even quieter. Proper sealing and covering turn a noisy closet into a tighter, more controlled environment—improving both sound isolation and internal acoustics.
Controlling Bass and Low-End Buildup in Tiny Spaces
Small closets often turn into bass traps, with low frequencies bouncing and creating a boomy sound. This is especially problematic because the limited space amplifies bass issues, making your recordings sound hollow or muddy. To fix this, add bass traps or use thick, soft materials in the corners where low-end tends to build up. Bass traps are specialized foam or mineral wool panels designed to absorb low frequencies, preventing them from resonating and causing muddiness.
For example, a streamer added a wedge-shaped foam bass trap in each corner, which significantly reduced low-frequency muddiness. Alternatively, placing a thick blanket or folded rug in the corners can serve as a DIY bass trap, though less effectively. The key is to treat the corners where low frequencies tend to concentrate, as ignoring these areas allows bass buildup to dominate your sound, leading to hollow or boomy recordings. Proper bass management ensures your vocals and instruments sound natural and balanced, even in tight spaces.
Understanding how low-end frequencies behave in small rooms helps you target your treatment effectively, avoiding the common mistake of neglecting bass issues that compromise overall sound quality.
Budget-Friendly DIY Materials to Build Your Closet Studio
You don’t need expensive gear to improve your closet soundspace. The best materials are affordable, widely available, and easy to deploy. These materials help absorb reflections, dampen echoes, and seal gaps without breaking the bank, making it accessible for hobbyists and beginners alike.
Here’s a quick list:
- Moving blankets (great for walls and door coverage)
- Foam panels (attach to walls for reflection control)
- Rugs and carpets (floor absorption)
- Soft furniture or fabric (to dampen echoes)
- Weatherstripping or acoustic sealant (gap sealing)
For example, a hobbyist built a makeshift booth with blankets, foam, and a rug, spending less than $100. The key is to strategically place these materials where they are most needed—behind the mic, on the door, and in corners. This approach maximizes absorption and minimizes echoes effectively, proving that good sound quality doesn’t require a huge budget.
Remember, the goal is to target reflection points and leaks with simple, inexpensive solutions. Over time, you can refine your setup by adding more materials or repositioning existing ones for optimal results.
Common Mistakes That Keep Your Closet Soundproofing from Working
Many people make simple errors that ruin their acoustic setup. The biggest? Relying only on foam panels and ignoring placement or gaps. This approach overlooks the importance of strategic positioning and sealing, which are often more effective than just adding more foam. Failing to address gaps around the door or corners allows sound to escape or enter, negating the benefits of your treatments.
Another mistake is sealing the space without considering ventilation, which can cause overheating and equipment issues. Covering only the walls without addressing the door or corners leaves big leaks and bass issues that undermine your efforts. For example, one creator covered all walls with foam but left gaps around the door, resulting in loud leaks and echo. Always treat gaps, seal leaks, and plan your placement carefully for optimal results. Remember, a well-sealed environment combined with proper placement is the key to effective soundproofing in a small closet.
Your Quick Guide to Building a Quiet, Clear Closet Rig
- Move your rig into a closet or separate room for maximum noise reduction.
- Seal gaps around the door with weatherstripping or blankets.
- Place foam panels on the walls behind and around your mic position.
- Add blankets or rugs on the floor, door, and ceiling to absorb reflections.
- Use soft materials in corners for bass control if needed.
- Ensure proper ventilation to keep your rig cool and prevent overheating.
Follow these steps, and you’ll cut noise dramatically without spending a fortune or sacrificing performance.
Frequently Asked Questions
Is acoustic dampening the same as soundproofing?
No, acoustic dampening reduces echoes and reflections inside a space, making sound clearer. Soundproofing blocks sound from leaving or entering a space. In small closets, dampening and sealing gaps are usually more effective than trying to fully soundproof.Where should I place my microphone in a closet booth?
Position your mic facing away from reflective surfaces like walls or the door. Place it near soft materials like foam or blankets, and aim toward a treated or absorbent surface to minimize bouncing sound and echo.Do foam panels really work in a closet?
Yes, foam panels help absorb reflections and reduce echo, especially in the ceiling and walls. But on their own, they won't stop sound leakage or bass buildup. Combining placement, gap sealing, and treatment gives the best results.How many panels or blankets do I need?
Start with enough foam to cover the walls behind and around your mic, plus blankets over the door and floor. Usually, 4-8 foam panels and a couple of blankets are enough for a decent start. Adjust based on your room's size and reflection issues.How do I stop sound from leaking through the door gap?
Use weatherstripping or acoustic sealant around the door frame. Adding a thick blanket or moving blanket over the door surface can also absorb residual sound and block leaks effectively.Conclusion
The key to a quiet, professional-sounding closet rig isn't just soundproofing—it's smart placement combined with targeted absorption. Moving your machine away from your ears and treating reflection points makes the biggest difference. Think of your closet as a blank canvas—use simple, affordable techniques to craft a space that sounds as good as it looks.
Remember, the best soundproofing is often just putting physical distance between you and the noise source. So, next time your rig hums loudly, imagine it tucked away in a closet or another room. Your workspace and your ears will thank you.