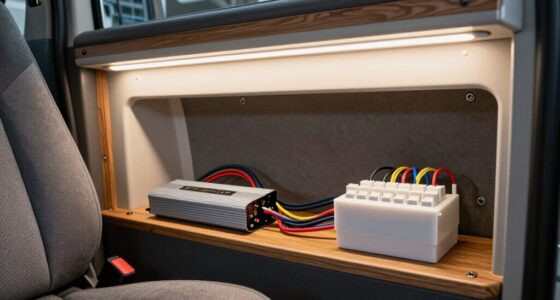
This guide walks you through selecting, positioning, and mounting cargo organizers in a Ford Transit van — including cargo shelves, rack systems, drawer units, and tie-down upgrades. By the end, you will have a securely fastened organizer layout that keeps tools and freight from shifting during transit, protects the driver behind the partition, and puts frequently used items within arm’s reach. The guide is written for tradespeople, fleet operators, and owners who want to do the install themselves with basic hand and power tools. Expect 3–4 hours for a simple shelf-and-partition setup, and up to a full day for a full rack or drawer system. No welding or advanced fabrication is required, but you will drill into the van floor or body in some configurations, so read the “Before You Start” section carefully before making any holes.

Get business pricing on garage and car supplies
- Business-only prices and quantity discounts
- Tax-exempt purchasing
- Multiple users, one account, clear invoices

LYNICESHOP Tailgate Storage Bag for 2012-2025 Ford Transit Custom
- ✔ Compatibility: 2012–2025 Ford Transit Custom
- ✔ Material: Double-layer Oxford cloth
- ✔ Set Includes: 2 storage bags

MELIPRON 60" H Steel Van Shelving Storage System for Full-Size Cargo Vans
- ✔ Dimensions: 52" W x 60" H x 13" D
- ✔ Material: Powder-coated steel
- ✔ Back Panel: 5mm PP

MIKKUPPA Trunk Organizer with Lid – 95L Collapsible Car Organizer, Black
- ✔ Dimensions: 33" L x 15.7" W x 11" H
- ✔ Capacity: 95 liters
- ✔ Item Weight: 2.8 kg
Difficulty: Intermediate | Time: 3-8 hours (depending on organizer type)
What You’ll Need
Tools & Materials:
- Cordless drill with 3/8-inch and 1/2-inch drill bits and driver bits
- Socket set (metric, 8mm–19mm) and combination wrenches
- Tape measure and carpenter’s square or straightedge
- Painter’s tape and permanent marker
- Torque wrench (recommended for final bolt tightening)
- Stud finder or strong magnet (for locating body wall ribs)
- Helper for lifting shelves or a partition into position
- Work light for the cargo area
- Vacuum or magnet sweep for metal drill chips
Knowledge:
- Basic hand-tool and power-drill competence
- Knowing your Transit’s roof height (low, medium, high) and wheelbase/length (e.g., T-250 regular, LWB, extended)
- Ability to read the organizer manufacturer’s mounting template
Before buying anything, measure your cargo area: floor length behind the driver seats, wall-to-wall width at the floor and at wheel-well height, and cargo height from floor to ceiling. Write these down and compare them against the organizer’s listed dimensions — organizer kits are sized by roof height and body length, and a unit built for a high-roof extended Transit will not fit a low-roof regular van. Record your VIN or body code when ordering so the supplier can confirm fitment.
LYNICESHOP Tailgate Storage Bag for 2012-2025 Ford Transit Custom
What makes this our top pick is that it solves a problem the other two can’t touch: the dead space on the inside of your rear doors. The Transit Custom’s tailgate panels are usually wasted real estate, and this two-bag set turns them into organized storage for tools, cleaning gear, and travel kit without consuming a single inch of floor space. Compared with the MIKKUPPA trunk organizer, which eats into your main cargo area, this option essentially creates storage from nothing.Build quality is where fabric organizers usually fall apart, but the double-layer Oxford cloth with reinforced stitching and a water-repellent inner coating suggests this set is built for van life rather than grocery runs. Zippers run smoothly across the multi-pocket layout, and the snap-on mounting means installation takes minutes — a stark contrast to the MELIPRON shelving, which demands drilling and a two-person, 1–1.5 hour install. If you rent, lease, or simply don’t want holes in your van, that difference is decisive.The tradeoffs are real, though. The set is specifically shaped for the 2012–2025 Transit Custom, so owners of the full-size Transit sold in North America should skip it entirely — check your model before ordering. And while the bags handle moderate tool weight well, no stated weight capacity means this isn’t the place for heavy power tools; that’s the MELIPRON’s job. Think of this as the smart, low-commitment middle ground: far more organized than a loose bag, far less invasive than steel shelving.
Pros:
- Custom-fit design tailored specifically for the 2012–2025 Ford Transit Custom
- Double-layer Oxford fabric with reinforced stitching holds up to daily use
- Water-repellent inner coating protects contents from moisture and grime
- Snap-on installation takes minutes with no tools or drilling
Cons:
- Only compatible with Ford Transit Custom models — not the full-size Transit
- No stated weight capacity, so heavy tools are off-limits
- Fabric construction can’t match steel shelving for serious commercial loads
Best for: Transit Custom owners who want meaningful added storage without drilling or losing floor space
Not ideal for: Full-size Transit owners or anyone needing to store heavy power tools and hardware
Bottom line: The smartest storage-per-effort ratio in this lineup — if you own a Transit Custom, this is where we’d start.
“The smartest storage-per-effort ratio in this lineup — if you own a Transit Custom, this is where we’d start.”
MELIPRON 60" H Steel Van Shelving Storage System for Full-Size Cargo Vans
If your Transit is a workshop on wheels, this is the only pick in this roundup that’s genuinely up to the task. The powder-coated steel frame with adjustable shelves and dividers lets you configure the unit around your actual tool load — something neither fabric option can offer — and the 52" W x 60" H x 13" D footprint is sized to sit along a full-size Transit’s wall without swallowing the whole bay. Compared with the LYNICESHOP bags, this is a different category of storage: heavier, more capable, and far more permanent.Two design details set it apart from typical budget van shelving. The 8-point drilled mounting system (base, middle, and top) keeps the unit rigid under braking and cornering, which matters when shelves are loaded with steel and fasteners. And the 5mm PP back panel does double duty — it cuts down rattling and protects your van’s interior panels from scuffing. A 2-year warranty with free replacement parts signals the manufacturer expects it to survive jobsite abuse.The commitment required is the obvious drawback. Drilling into your van is permanent, the install realistically needs two people and 1–1.5 hours, and the system isn’t universal — you must verify fit against your specific Transit wheelbase and roof height before buying. If you’re a weekend hauler or you plan to sell the van soon, this is overkill; the LYNICESHOP or MIKKUPPA will do the job for a fraction of the hassle. But for daily trades use, nothing else here comes close.
Pros:
- Heavy-duty powder-coated steel construction built for commercial use
- Adjustable shelves and dividers for fully customizable organization
- 8-point mounting system keeps the unit stable while driving
- 2-year warranty with free replacement parts
Cons:
- Drilling required — installation is permanent and invasive
- Two-person install recommended, taking 1–1.5 hours
- Fit must be verified against your specific van before purchase
Best for: Tradespeople and fleet operators who need permanent, heavy-duty jobsite storage
Not ideal for: Lease drivers, weekend users, or anyone unwilling to drill into their van
Bottom line: The serious choice for working vans — buy it if your Transit earns its keep, skip it if storage is a weekend problem.
“The serious choice for working vans — buy it if your Transit earns its keep, skip it if storage is a weekend problem.”
MIKKUPPA Trunk Organizer with Lid – 95L Collapsible Car Organizer, Black
Where the other two picks commit to your van, this one stays deliberately uncommitted — and that’s its whole appeal. The 95-liter capacity across a 33" x 15.7" x 11" footprint gives you serious organized volume, but the organizer collapses to a flat profile in four adjustable sizes when you don’t need it. That makes it the only option here you can pull out of the Transit on Friday and toss in the family SUV on Saturday, something neither the bolted-down MELIPRON nor the door-mounted LYNICESHOP can do.For a soft organizer, the details are thought through. The lid keeps contents contained — useful in a van where everything becomes a projectile under hard braking — while the non-slip bottom and two adjustable securing straps address the biggest weakness of fabric organizers: sliding around an empty cargo bay. Multiple pockets give smaller items a home, and the oxford polyester fabric is tough enough for groceries, camping gear, and clothing loads. It’s a genuinely versatile piece for mixed-use owners.The honest tradeoff is capacity type. At 2.8 kg it’s noticeably heavier than many collapsible rivals, and no matter how good the straps are, soft-sided storage will never secure heavy tools the way the MELIPRON’s steel shelves do — this is for manageable cargo, not a mechanic’s kit. It also isn’t Transit-specific, so you’re trading the LYNICESHOP’s tailored door fit for universal convenience. If your storage needs change week to week, that trade is worth making; if they don’t, it isn’t.
Pros:
- Collapsible design with four adjustable sizes for flexible storage
- Lid prevents items from spilling during transit
- Non-slip bottom and adjustable securing straps keep cargo stable
- Moves easily between the Transit and other vehicles
Cons:
- At 2.8 kg, heavier than many collapsible alternatives
- Soft-sided build can’t handle heavy tool loads like steel shelving
- Generic fit — no Transit-specific tailoring or mounting
Best for: Owners who split their van between work, errands, and recreation and want removable storage
Not ideal for: Commercial users with heavy tools or anyone wanting a permanent van-specific fit
Bottom line: The flexible all-rounder for mixed-use Transit owners who value portability over permanence.
“The flexible all-rounder for mixed-use Transit owners who value portability over permanence.”
As an Amazon Associate we earn from qualifying purchases.
Before You Start
Warnings before you drill or bolt anything:
- Check for wiring and fuel lines. Transit cargo-area floors and lower walls can conceal wiring harnesses for lighting, sensors, and rear-door modules. Inspect from under the van before drilling, and never drill blind through the floor.
- Decide between bolt-through and clamp-on. Bolt-through mounts are strongest but penetrate the floor; clamp and flange systems that use existing threaded inserts or body ribs avoid holes. If your van is leased or may be returned, prefer no-drill systems.
- Plan for weight distribution. Heavy drawer units and racks should sit forward, between the axles where possible, and slightly toward the driver’s side if you typically drive solo — this balances the load.
- Check local regulations. Many jurisdictions require a cargo partition or barrier for commercial vans carrying loose cargo; verify your requirements before finalizing the layout.
- Unpack and inventory the kit indoors first. Confirm all brackets, bolts, and templates are present. Missing hardware is the most common cause of a stalled weekend install.
Step-by-Step Instructions
Step 1: Empty and clean the cargo area
Remove all existing cargo, mats, and debris from the van. Sweep or vacuum the floor and wipe down the walls where the organizer will mount. Dirt and grease under brackets reduce grip and can cause hardware to loosen over time.
Tip: Work in daylight or with a bright work light — factory floor ribs and existing threaded mounting holes are much easier to spot on a clean surface.
Check: The bare floor and walls are clean, dry, and you can clearly see the factory floor ribs and any existing threaded inserts.
Step 2: Map your layout with tape and mark anchor points
Lay out the organizer positions using painter’s tape on the floor and walls to outline each unit. Place the heaviest items (drawers, compressed shelving) forward and the lightest or most frequently accessed items near the sliding door. Walk through a simulated workday: open the sliding door, reach for your most-used tools, and confirm nothing blocks the reach path or the rear doors. Once satisfied, use a marker to transfer the tape outlines to permanent reference marks and mark hole locations through the manufacturer’s template.
Tip: Leave at least 2 inches of clearance between any wall-mounted shelf and the sliding door track so the door never contacts the unit.
Check: You can open and close both rear doors and the sliding door fully with the tape outlines in place, and every hole location is marked.
Step 3: Install the cargo partition or barrier first (if using one)
Position the partition between the cargo area and the cab with a helper. Most Transit partitions mount to factory points behind the seats or clamp to body ribs — follow the kit instructions for your roof height. Hand-start all bolts before tightening any of them fully, then torque each fastener to the specified value. Verify the partition does not interfere with seat travel before final tightening.
Tip: Set the driver’s seat to its rearmost driving position and slide it fully front-to-back after mounting. A partition installed 1 inch too far forward will force an uncomfortable seating position permanently.
Check: The partition does not move when pushed firmly, seats travel through their full range, and no bolts protrude into the cab.
Step 4: Drill mounting holes (bolt-through systems only)
Re-check under the van one final time at each marked location. Drill pilot holes from inside the van using a sharp bit, keeping steady downward pressure. Deburr each hole and sweep up all metal chips immediately — loose swarf rusts into the floor and punctures tires. If your kit uses existing threaded inserts, skip drilling and thread the supplied bolts directly.
Tip: Place a strong magnet directly below the drill point (held by a helper under the van) to catch most chips as they fall.
Check: Each hole is clean, free of burrs, and the supplied bolt passes through it without forcing.
Step 5: Mount the shelving or rack units
Lift each shelf or rack unit into position against your marks with a helper. Hand-start the floor bolts, then the wall or crossmember brackets, then tighten everything in that same order to the manufacturer’s torque spec. Attach any anti-rattle hardware, back panels, and shelf retainers or lips that came with the kit — these keep contents in place during braking.
Tip: Do not fully torque the first unit until the adjacent unit is trial-fitted. Multi-bay systems often need small position adjustments to line up evenly.
Check: The unit does not rock, flex, or shift when you push hard on each corner, and all shelf lips or retainers are installed.
Step 6: Install drawer units and secure them to the structure
Slide drawer units into position and bolt them to the shelving uprights or directly to the floor using the same process as the shelves. Open and close every drawer fully several times — drawers must latch closed and stay latched. If the unit did not come with a latch, add aftermarket drawer latches; an unlatched drawer that slides open during a turn is a serious hazard.
Check: Every drawer opens smoothly, closes fully, and stays latched when you shake the unit.
Step 7: Add tie-downs, cargo nets, and load straps
Install any additional D-ring or L-track tie-down points in open floor areas using the same drilling and checking process. Fit cargo nets or bungee grids across open shelf faces. Place straps where you will actually use them for loose cargo between the organized zones.
Check: Every open storage zone has either a lip, a net, or a strap, and nothing on the shelves can slide off under hard braking.
Step 8: Load the van and do a road test
Load your actual tools and cargo in their planned positions. Drive a short route that includes hard braking, tight turns, and a bumpy road, then stop and inspect: listen for rattles, check that drawers stayed latched, and re-tighten any bolt that has loosened. Re-check all fasteners again after the first week of use.
Check: After the drive, nothing has shifted, no rattles are audible, and all hardware remains tight when checked with a wrench.
Common Mistakes to Avoid
- Buying an organizer sized for the wrong roof height or wheelbase. — Measure your cargo area and confirm fitment against the manufacturer’s chart before ordering; when in doubt, call the supplier with your body code.
- Drilling into concealed wiring or the fuel tank area. — Always inspect from under the van before drilling, and never drill within 3 inches of wiring runs or without a clear line of sight underneath.
- Loading heavy items behind the rear axle, which lightens the front wheels and worsens handling. — Keep dense, heavy cargo forward, between the axles, and check that the van is not overloaded beyond its payload rating on the door-jamb sticker.
- Skipping shelf lips, drawer latches, and tie-downs to save time. — Install every retention component the kit includes before the road test — these parts are what prevent cargo becoming a projectile under braking.
Troubleshooting
Problem: Unit rattles or rocks after installation.
Solution: Loosen all fasteners on that unit, press it firmly against the wall or floor ribs, and re-torque in sequence. Add rubber isolation pads between the unit base and the floor if a gap remains — never leave the unit tensioned only by a single bolt.
Problem: A drilled hole lands in the wrong spot or misses the rib.
Solution: Do not enlarge or reuse the hole. Fill it with a body plug and silicone sealant to keep water out, then re-measure and drill a new hole. Double-check that the template was not reversed — this is the most common cause of misdrilled holes.
Problem: Drawers bind or will not close fully.
Solution: The unit is slightly out of level or twisted. Loosen the mounting bolts, level the cabinet with shims under the low corner, and re-tighten. Check that nothing on an adjacent shelf is contacting the drawer slides.
Problem: Sliding door scrapes or catches on the new shelf.
Solution: Remove or reposition the interfering bracket or shelf edge. Maintain at least 2 inches of clearance to the door track; if the layout cannot provide it, switch that bay to a lower-profile shelf.
What Success Looks Like
The install is complete when all of the following are true: every unit is bolted or clamped so it does not move under a hard push; the sliding door and both rear doors open fully without contact; seats and partition do not interfere with each other; every shelf, drawer, and open bay has a retention device; a road test with a full load produces no rattles, shifting, or loosened fasteners; and the van’s total load is within the payload rating on the door-jamb label. Walk the finished layout one more time and confirm your five most-used items are reachable from the sliding door without climbing inside.
Next Steps
Re-check every bolt after the first week of daily driving, then inspect the system quarterly — vibration loosens fasteners gradually, and a quick torque check takes ten minutes. Add LED cargo-area lighting if you work early or late; magnetic and stick-on units require no wiring. Label shelves and drawers so tools return to the same spot, which keeps the layout effective long-term. If you later add heavy equipment such as a compressor or generator, re-check payload and consider bolting it to dedicated L-track rather than the shelf system. For electrical upgrades (inverter, aux battery), consult a professional installer before tying into the Transit’s electrical system.
Frequently Asked Questions
Do I have to drill holes in my Transit to install cargo organizers?
No. Several manufacturers offer no-drill systems that clamp to existing body ribs or use factory threaded inserts in the floor. These are a good choice for leased vans. Bolt-through installations are stronger for heavy loads, but either approach is acceptable when the unit is properly torqued and retained.
Will a cargo organizer fit all Transit roof heights?
No. Organizers are sized by roof height (low, medium, high) and body length. A tall shelving unit for a high-roof Transit will not fit a low-roof van. Always measure your cargo height and length and match them to the manufacturer’s fitment chart before ordering.
How much weight can I put on cargo shelves?
Follow the shelf manufacturer’s rating, which typically ranges from 100 to 300 pounds per shelf depending on design. More importantly, keep the total load within the van’s payload rating printed on the driver’s door jamb sticker — exceeding payload affects braking and handling and can void insurance coverage.
Is a cargo partition legally required?
Requirements vary by jurisdiction and employer policy. Many regions and fleets require a barrier between cargo and occupants for commercial vans. Even where not required, a partition is strongly recommended because unsecured cargo moving forward in a crash is a major injury risk.
Can I install the organizer system by myself?
Smaller shelf units can be installed solo, but a full-height partition or heavy drawer unit realistically needs a second person to lift and hold components while bolts are started. Plan for a helper for at least the lifting stages.
Fall Picks
fall essentials
As an affiliate, we earn on qualifying purchases.